Granny Flat Design NZ: How to Design One That Actually Works in 2026
Quick answer: From 15 January 2026, a detached granny flat up to 70m² can be built in NZ without a building consent or resource consent — provided the design stays inside specific limits. Good design within the 70m² constraint, not the regulatory paperwork, is the real challenge.
Last December, the rules quietly changed. From 15 January 2026, you can build a detached granny flat up to 70m² on your Auckland section without a building consent and without a resource consent — provided the design stays inside very specific limits. Most of the trade press has covered the headline. What nobody is writing about is the design problem this has created.
We’ve already had the calls. Homeowners ring us with prefab brochures in hand, asking whether the unit in the brochure will fit on their North Shore section. Almost every time, the answer involves trade-offs the brochure hasn’t mentioned. The 70m² exemption isn’t a free pass — it’s a tight design constraint. Get it right and you have a small home that genuinely works. Get it wrong and you have a 70m² shell with the kitchen wedged into the wrong corner, services running 22 metres to reach the unit, and a layout that ages your parents faster than it should.
This guide is written from a different angle to most of what’s online. We’re not a prefab company trying to sell you a product. We’re an Auckland architectural studio. Our director John Mao is a Licensed Building Practitioner (LBP — a tradesperson certified to design and supervise certain building work under NZ law) in the Design Class, and we design granny flats from scratch on real sites. Every week we sit at the table with homeowners who’ve been sold a layout that doesn’t suit their section or their situation.
Here’s what we’ll cover. First, what the 70m² exemption actually allows — and what it doesn’t, which is the part most homeowners miss. Then the three different design playbooks for the three different reasons people build these units: ageing parents moving in, generating rental income, or adult kids staying close. Then the choice between detached, attached, and converting an existing garage. Finally, the Auckland-specific constraints that change what’s possible on your section, and the five mistakes our LBP designers see most often on plans that come across the desk for review.
What the 70m² Granny Flat Exemption Actually Allows
For decades, a granny flat in NZ meant going through the full building consent process and, if your section was in the wrong zone, a resource consent on top. Costs and delays were significant. Then on 15 January 2026, two exemptions came into effect that quietly rewrote the equation.
Most homeowners now understand the headline: you can build a granny flat up to 70m² without consent. What’s missing in most of the content online is that this is actually two separate exemptions stacked on top of each other, and each one stops applying at a different point. If your design steps outside either set of limits — even by a small margin — consents return. Knowing where the edges are is the first design decision.
Two exemptions, working together
The first is the building consent exemption under the Building Act 2004 (the national law that governs building consents in NZ). Small standalone dwellings up to 70m² are now exempt from needing a formal building consent, provided the design meets the exemption criteria and the work is carried out or supervised by appropriately licensed professionals. That includes LBP designers like our team and Licensed Building Practitioner builders.
The second is the resource consent exemption under the NES-DMRU — the National Environmental Standard for Detached Minor Residential Units (a set of national planning rules that override most local council rules for these specific unit types). Under the NES-DMRU, a detached minor residential unit up to 70m² on a section that already has a main dwelling is treated as a “permitted activity” — meaning no resource consent is needed, provided the design meets the standard’s development requirements.
The two exemptions work together but they’re separate doors. Pass through the first and you skip the building consent process. Pass through the second and you skip the resource consent process. Most well-designed granny flats can pass through both. Some can only pass through one. A small number can pass through neither — and that’s not always a failure, sometimes it’s the right design decision for the section.
💡 Homeowner tip: Before you commit to a prefab unit or a custom design, ask whether it can pass through both exemption doors on your specific section. The answer changes depending on zone, slope, hazard status, and existing services. A free feasibility report is the cheapest way to find out.
Where the exemption stops
This is the part most homeowners miss when they’re shopping for a prefab unit. The exemption is conditional on a specific set of design and site criteria. Step outside any of them and the regulatory path returns to the old process.
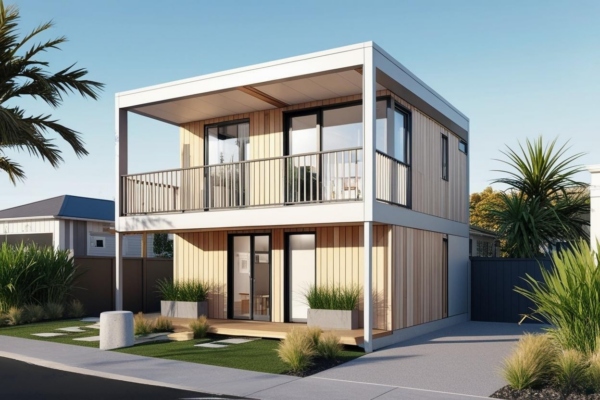
The unit must be single-storey. A two-storey design — even a small mezzanine — falls outside the exemption.
The unit must be detached. A flat attached to the main house, or a garage conversion that connects internally to the existing home, doesn’t qualify. We’ll get to the design trade-off this creates in the next section.
The site can’t have specific natural hazards on the council’s file. If your property is in a flood-prone area, a coastal inundation zone, or a known landslide-risk area, you still need a resource consent. Auckland Council’s GeoMaps tool will tell you whether your section is flagged.
Heritage overlays and Special Character Areas still apply. Live in a character bungalow in Grey Lynn, Ponsonby, Mt Eden, or one of Auckland’s other Special Character Areas (designated zones where additional design rules apply to protect the character of the streetscape), and the heritage rules in the Unitary Plan (Auckland’s single planning document covering all zoning and development rules) still control what you can put in your back garden. The exemption doesn’t override them. We’ve written separately on how the heritage overlay Auckland rules work and what they mean for back-garden builds.
Onsite wastewater is its own issue. If your section isn’t connected to Auckland’s reticulated wastewater network (the council-run pipe system that carries waste to a treatment plant) — common in lifestyle blocks around Riverhead, Kumeu, and Clevedon — you need a wastewater design and consent that the exemption doesn’t cover.
Important: The exemption doesn’t change Auckland Council’s requirement to notify them before and after construction. The unit will be recorded on the property file and will appear on future LIMs (Land Information Memorandums — detailed council reports on a property including consent history). Skipping notification is not the same as skipping consent. Full guidance is on building.govt.nz.
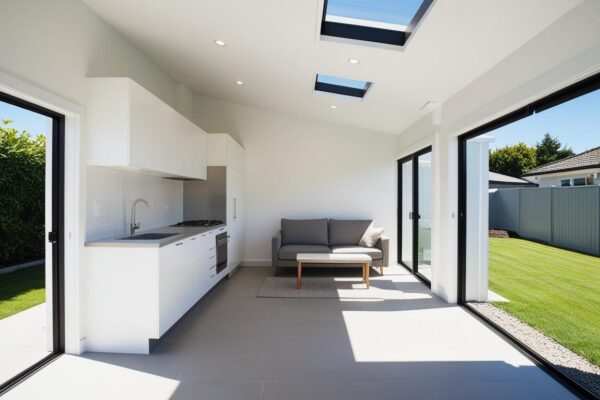
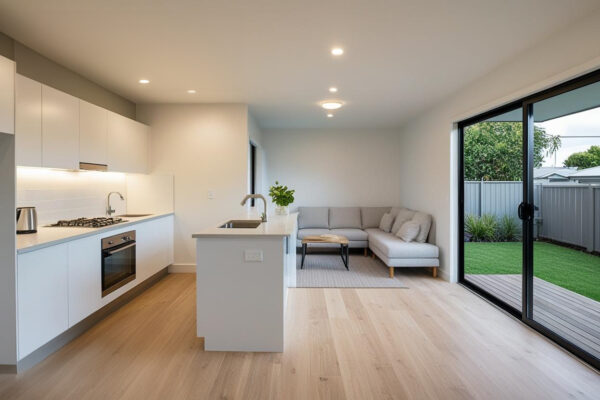
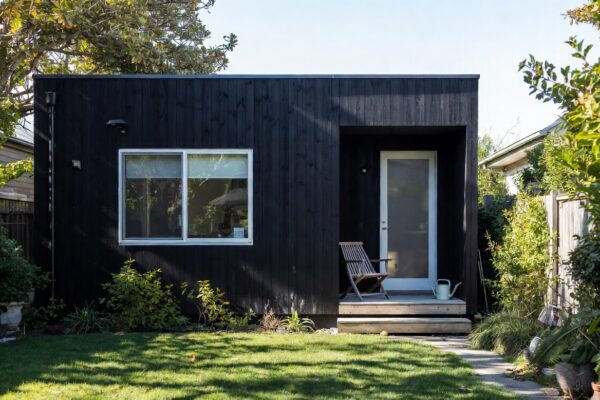
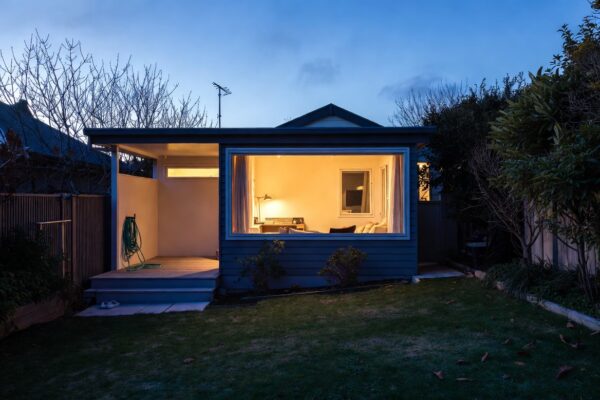
What 70m² actually feels like
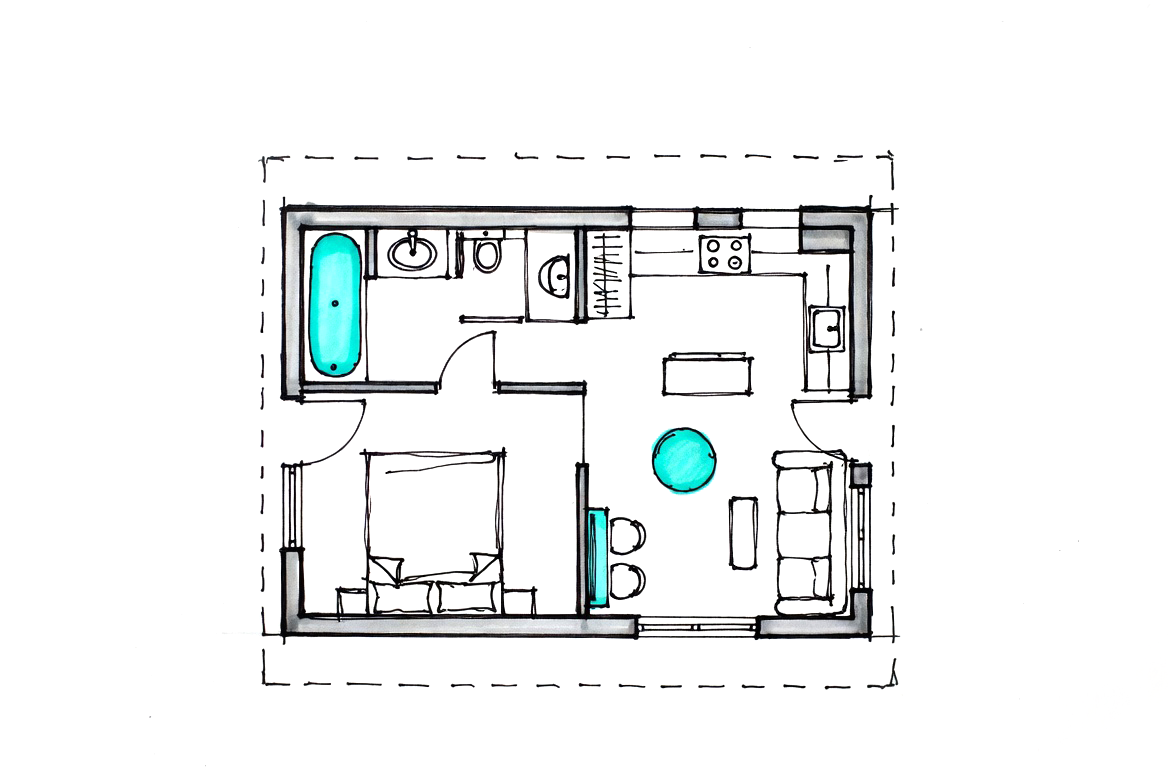
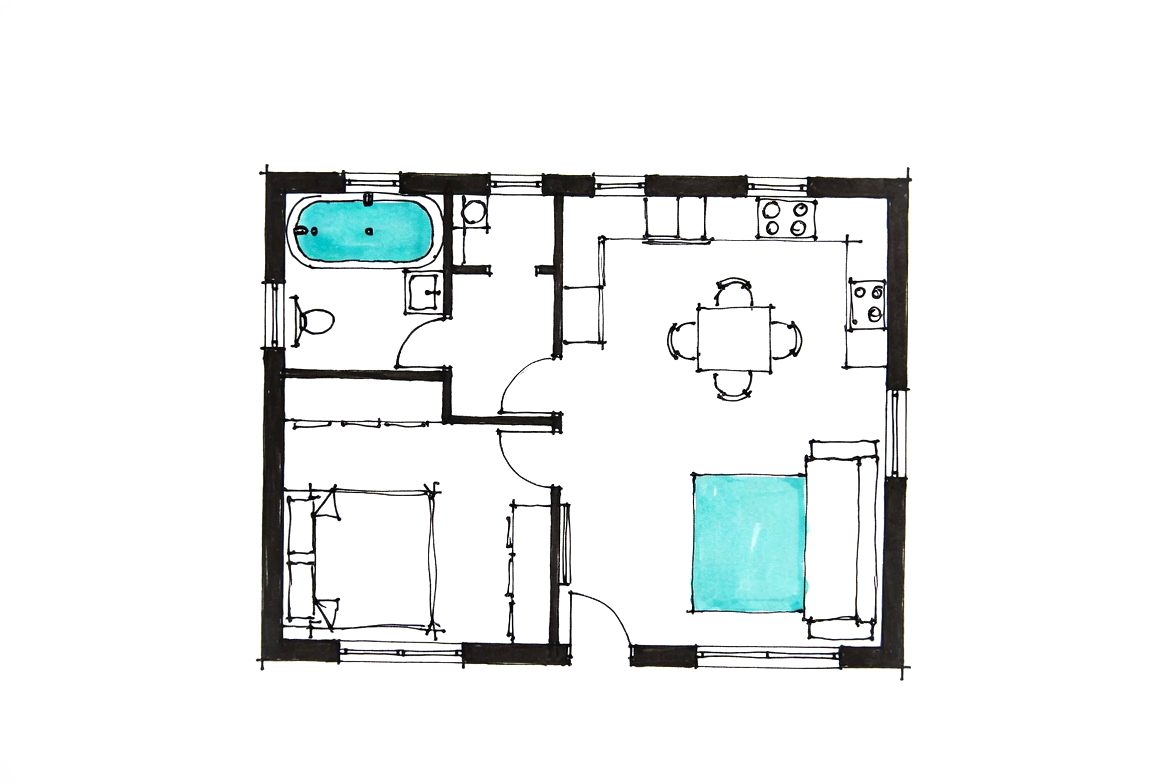
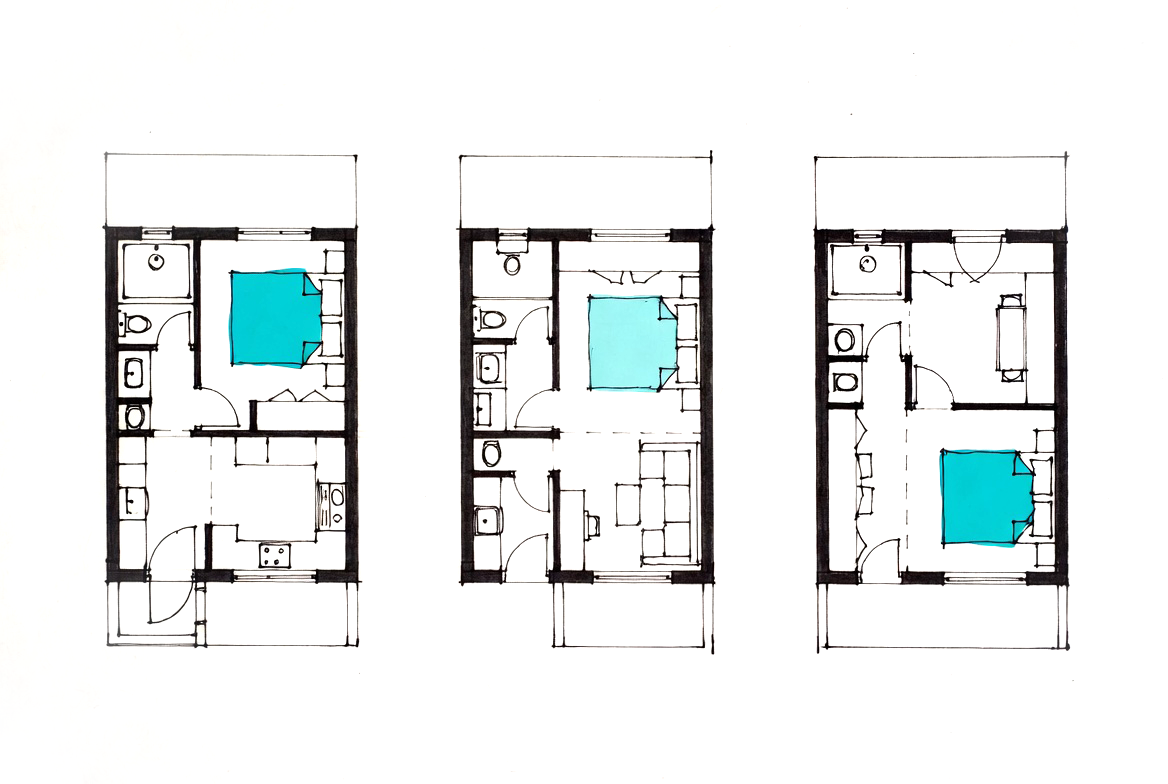
Numbers on a page aren’t space. A 70m² granny flat is roughly the size of a generously-proportioned hotel suite, or about half of a typical Auckland three-bedroom home. Once you account for a kitchen, bathroom, laundry, and circulation (hallways and door swings), you have maybe 35-40m² of actual living and bedroom space to split.
That’s enough for a comfortable one-bedroom design with a real living space, a proper kitchen, and a bathroom with a separate laundry. It’s also enough for a two-bedroom design, but the trade-off is that everything else gets tighter — smaller bedrooms, a narrower kitchen, and very little hallway. The “right” answer depends entirely on who’s living in it. We’ll work through that next.
For Auckland sections, the practical limit is often less than the regulatory limit. Site coverage, height-to-boundary, and access for the build all reduce what’s actually possible on the ground. The exemption tells you the maximum. The section tells you what’s actually buildable.
Three Audiences, Three Design Playbooks
Most granny flat marketing leans on one audience — “perfect for parents,” “income for life,” “keep adult kids close” — and pretends the design implications are the same. They aren’t. The single biggest mistake we see in prefab unit selection is choosing a layout designed for one use case and trying to make it work for another.
Here’s how we think about the three.
Designing for ageing parents
This is the audience that pays the highest price for design shortcuts, because the shortcuts only show up later, when mobility changes.
The single-level rule of the exemption is actually a gift for this audience. No stairs, no level changes, no thresholds higher than 20mm. We design with that as a hard constraint from the first sketch.
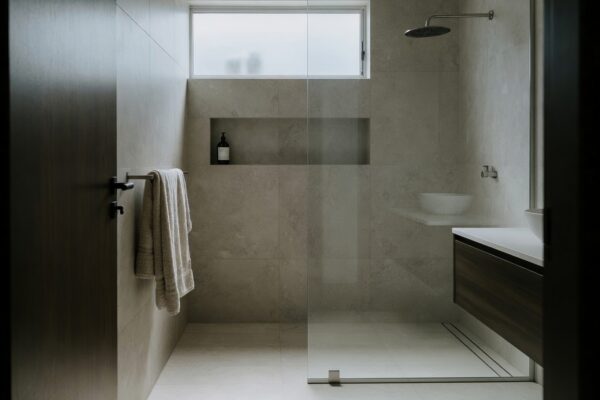
What we add to the brief: a wider front door (we specify a clear 870mm opening minimum, ideally 920mm for wheelchair access in future), a step-free entry path from the driveway, a bathroom designed with a level-entry shower and reinforced wall framing in the right places for handrails — even if no rails are installed at the build. The framing costs almost nothing extra; retrofitting later costs thousands.
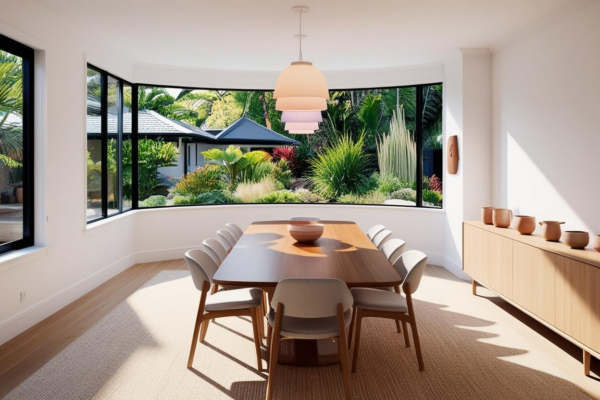
Layout-wise, the bedroom and bathroom go on the same side of the unit, so a tired walk to the bathroom at 2am isn’t a long journey across the dark. The kitchen sits in line of sight from the living area — important for early-stage dementia, when people lose track of pots on the stove. Windows are positioned for natural light into the bedroom on the morning side and into the living area on the western side, because retirees spend more time at home and natural light supports sleep cycles.
We also think about line of sight to the main house. Many adult children want to keep an eye on their parents without being intrusive. A small window or a glazed door that connects visually — but not acoustically — to the main house’s kitchen or living space is a quiet design detail that pays off every day.
💡 Homeowner tip: Even if your parents are mobile and independent today, design as if they’ll need accessibility features in ten years. Reinforced bathroom framing, accessible-width doorways, and a level-entry shower add almost nothing to the build cost — but turn into $15,000+ retrofits if added later.
Designing for a rental tenant
This audience needs the opposite of the previous one — design that maximises privacy from the main house, not connection to it.
Three things matter most: separate entry, acoustic separation, and separate services where the council allows it.
Separate entry means a path to the front door that doesn’t pass any windows of the main house, and ideally doesn’t share a driveway with the main house’s parking. On a typical 600-700m² section in suburbs like Mt Albert or Sandringham, this often means siting the unit at the rear of the section with its own pedestrian access along one boundary.
Acoustic separation matters more than most homeowners expect. If the main house and the unit share an outdoor area, conversations carry, kids cry, and tenants feel watched. We design with a fence line or a planted buffer between the two outdoor areas, and we orient the unit’s main living windows away from the main house’s windows.
Separate services is the third piece. Where Watercare (Auckland’s water and wastewater utility) permits, we run a separate water meter for the unit so usage can be billed back to the tenant. Electrical is almost always separately metered. Gas, if you’re using it, is more complex — for small units we often recommend full-electric to avoid the metering issue entirely.
There’s also a design tension this audience creates: you want to maximise rental return, which suggests a two-bedroom layout. But a two-bedroom 70m² unit reads as cramped on the open market. A well-designed one-bedroom with a generous living space often rents for a higher per-m² return than a two-bedroom that feels squeezed. Our minor dwelling cost guide works through the rental yield maths in detail.
💡 Homeowner tip: Don’t assume more bedrooms means more rent. Auckland’s rental market consistently pays a premium for spatial quality over bedroom count at the small end of the market. A 70m² one-bedroom with a proper living space outperforms a 70m² two-bedroom in most suburbs.
Designing for adult kids
This is the audience most people design for badly, because they treat it as “rental design but cheaper.” It isn’t.
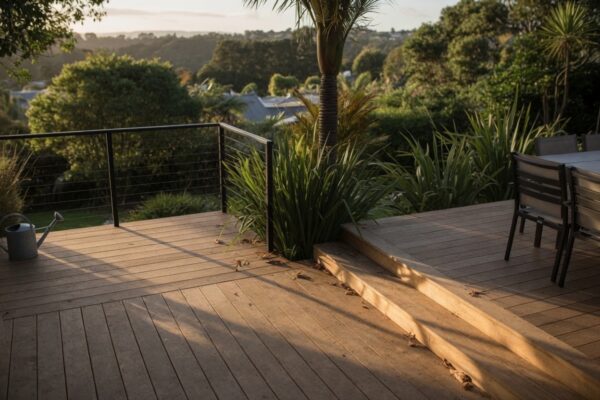
Adult kids living in a granny flat on the parental section usually want connection more than privacy, at least at first. They share meals in the main house, share streaming services, sometimes share a car. The design implications: shared services are fine (cheaper to install), the outdoor space can connect to the main house’s deck or yard, and the unit doesn’t need the acoustic separation a tenant would.
But here’s the trap. Adult kids don’t stay forever. The unit you build for your 24-year-old daughter today will, in 8-12 years, become either a rental, a guest unit, or a place for one of you to live in when stairs in the main house get harder. Designing only for the current use locks the future down.
So we design adult-kid units the same way we design ageing-parent units: with the bones of accessibility, with the wiring for separate metering even if it isn’t activated at first, and with a layout that can flex from a connected family arrangement today into a private rental or a parents’ retreat later.
“The cheapest granny flat is the one designed once, not built once and renovated three times when the household changes. Build the bones for every future use, even if you only need one of them right now.”
— Sonder Architecture Team
How the three playbooks compare
| Design priority | Ageing parents | Rental tenant | Adult kids |
|---|---|---|---|
| Connection to main house | High — line of sight valuable | Low — privacy critical | High at first, may shift later |
| Accessibility (door widths, thresholds) | Essential | Helpful, not essential | Design now for later |
| Acoustic separation from main house | Moderate | Critical | Low initially, design in for future |
| Separate metering | Optional | Yes — electrical at minimum | Wire for it, activate later |
| Best layout | 1-bed with generous living and accessible bathroom | 1-bed with quality finishes | Flexible 1-bed with study/second-bedroom option |
| Future-proofing priority | High | Medium | Highest — use will change |
Detached, Attached, or Garage Conversion — Which Path Fits Your Site
The 2026 exemption is detached-only. This single fact has pushed almost every homeowner conversation toward a detached design, regardless of whether detached is the best answer for the section. It often is. Sometimes it isn’t.
Detached — the consent-exempt path
If your section can fit a 70m² detached unit within Auckland’s height-to-boundary and site coverage limits, the exemption is hard to beat. You skip the building consent process. You skip the resource consent process. You save anywhere from $7,000-$20,000 in council fees and professional fees on consent applications, plus 8-16 weeks of waiting time. (For the full cost picture, see our breakdown of what a minor dwelling actually costs to build in NZ.)
The trade-off is design constraint. Detached means a separate roof, separate walls, separate foundation slab. Costs per m² run higher than an attached unit because there’s no shared structure to spread the building cost across.
The other trade-off is services. A detached unit at the rear of a 30-metre-deep section needs water and wastewater pipes running the full length of the section, plus electrical, plus potentially gas. That can add $15,000-$30,000+ to the build depending on the run length and what’s already on site. We see this surprise homeowners more than any other budget line.
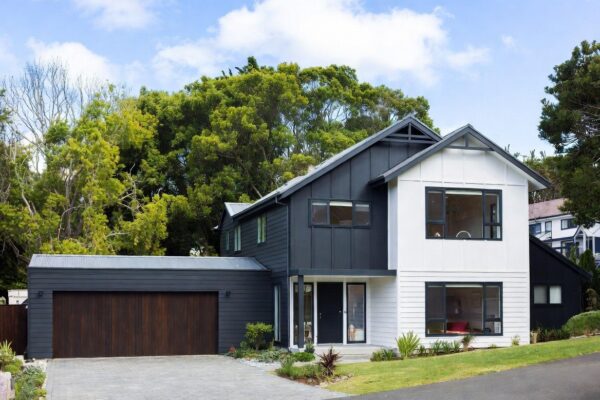
Attached — the shared-services path
An attached granny flat — a self-contained unit that shares one wall with the main house — needs a building consent. There’s no way around that, even in 2026. But the design and cost trade-offs go in your favour on several fronts.
Services share. The unit can tap into the existing water, wastewater, and electrical infrastructure of the main house, often within a few metres of where it’s needed. That saves the long services run we just described.
Heat loss drops. A shared wall reduces the unit’s external wall area, which means less heat loss in winter and better thermal performance overall. For small footprints this matters more than for large ones — you’re heating a smaller volume, and every wall counts. The H1 insulation rules (the NZ Building Code clause covering thermal performance) are easier to meet when you have less external envelope to insulate.
Build cost per m² drops. Less roof to build. Less external cladding. A foundation that often extends the existing slab. Where a detached unit might cost $5,500-$7,000+ per m² to build, an attached unit on the same section can come in at $4,500-$6,000 per m² for a comparable spec.
What you give up: the consent path costs more in fees and time. The building consent process means more documentation and more design work for our LBP designers, which translates to roughly $5,000-$12,000 in additional consent and design costs over an equivalent detached unit. The trade-off is usually worth it when you’re saving more than that on services and per-m² build cost.
There’s also a livability question. A wall shared with the main house means sound transfer is now a major design issue — we specify acoustic insulation in the shared wall, careful door placement, and often a buffer space like a laundry or storage between the two halves.
Important: Attached extensions to character homes in Auckland’s Special Character Areas (Grey Lynn, Ponsonby, Mt Eden, Parnell, Freemans Bay, parts of Devonport) trigger additional design controls under the Unitary Plan. Visible changes to the street elevation usually need a resource consent. Our heritage overlay guide covers what’s allowed and what isn’t.
Garage conversion — the existing-shell path
This is its own design problem. Converting an existing garage into a self-contained dwelling is often the cheapest path on paper, but the design challenges are different to building from scratch.
The shell already exists, but it almost certainly doesn’t meet the New Zealand Building Code (the national performance standards every habitable building must meet) for habitable space. We typically need to upgrade the insulation, the foundation, the windows, the door openings, often the roof framing, and almost always the floor levels. We’ve written a detailed breakdown of garage conversion costs and the design issues that come up.
Done well, garage conversions add a granny flat at 50-70% of the cost of building new. Done badly, they cost more than a new build because the upgrades fight against the existing structure.
The 2026 exemption doesn’t apply to garage conversions, because the original structure wasn’t built as habitable space. The work needs a building consent — and if the garage shares a wall with the main house (most do), there’s no way around the consent process even under the new rules.
💡 Homeowner tip: Don’t pick the design path on consent status alone. The cheapest total-project path depends on your section’s services layout, slope, and existing structures. Run all three paths through a feasibility study before committing — we do this in every Sonder feasibility report.
How the three paths compare
| Factor | Detached (exempt) | Attached | Garage conversion |
|---|---|---|---|
| Building consent | Not required (if exempt) | Required | Required |
| Resource consent | Not required (if exempt) | Usually not required | Usually not required |
| Typical build cost per m² | $5,500-$7,000+ | $4,500-$6,000 | $3,500-$5,500 |
| Services run cost | $10,000-$30,000+ | $3,000-$8,000 | $3,000-$10,000 |
| Design flexibility | High | Medium | Constrained by existing shell |
| Timeline (design to move-in) | 4-7 months | 7-10 months | 5-8 months |
| Best suited to | Sections with rear space and existing services nearby | Sections where the unit can sit close to the main house | Sections with an existing oversized or detached garage |
When homeowners need both the architectural design and a renovation partner to handle the main house side of an attached build, we work hand-in-hand with our renovation arm, Superior Renovations — same group, same office, end-to-end project handling.
Auckland-Specific Design Considerations for Granny Flats
Most national content treats NZ granny flat rules as if they’re identical from Whangārei to Invercargill. They aren’t. Auckland has site coverage rules, Watercare connection rules, and heritage overlays that change what’s actually buildable. Here’s what we work through on every Auckland site.
Site coverage — what your section actually allows
Site coverage (the percentage of your section that can be covered by buildings) varies by Unitary Plan zone. In Single House Zone — the most common residential zone in older suburbs like Mt Albert, Sandringham, Western Springs, and Onehunga — site coverage is typically capped at 35%. In Mixed Housing Suburban it rises to 40%. In Mixed Housing Urban — common closer to the central city and along transit corridors — it can reach 45% or higher.
What this means in practice: a 600m² section in Single House Zone allows around 210m² of building footprint. If your existing house is 140m² on the ground (typical for a 1960s brick-and-tile), you have 70m² left for the granny flat. Exactly at the exemption maximum. There’s no room to go larger, and no buffer if the foundation slab extends beyond the wall line — which it usually does.
Heritage overlay sections often have stricter site coverage caps. If your property has a heritage overlay (a planning rule protecting historic buildings or character streetscapes) or sits within a Special Character Area, you may be capped at 30% or lower. The standalone granny flat may still fit, but the margins get tight.
Height-to-boundary
This rule controls how close to a boundary you can build at what height. In most Auckland residential zones, the rule works on a 2.5m vertical wall at the boundary, then a 45-degree sloping plane back from there. So if your unit’s eave height is 4m, the wall has to sit roughly 1.5m back from the boundary.
For a 70m² single-storey unit this is rarely a deal-breaker, but it does affect site placement. Tuck the unit too close to the rear boundary and the roof line gets clipped by the rule. We’ve seen homeowners commit to a unit design that “looks like it fits” only to find at the design verification stage that the eaves need to be lowered, the roof pitch flattened, or the unit shifted a metre forward.
Watercare and services connection
Auckland’s water and wastewater network is run by Watercare. Connecting a new dwelling — even an exempt one — usually requires a new connection or an upgrade to the existing one. Costs range from around $5,000 for a straightforward shared-line connection up to $25,000+ for a new connection on a section without existing services nearby.
The exemption removes the building and resource consent steps. It doesn’t remove the Watercare connection process. This is the most common surprise we see homeowners walking into. Budget for it from day one — it’s the line item most prefab quotes leave out.
Important: Auckland Council and Watercare are separate organisations with separate processes. Even if your granny flat is exempt from building consent under the Building Act, the Watercare connection process still applies. Apply to Auckland Council for the property notification and to Watercare for the services connection. Don’t assume one covers the other.
Heritage overlays and Special Character Areas
If your property is in one of Auckland’s Special Character Areas — Ponsonby, Grey Lynn, Mt Eden, Parnell, Freemans Bay, Westmere, parts of Devonport — the Unitary Plan controls what can be visible from the street. A 70m² granny flat in the back garden is usually fine; the same unit visible from the street will trigger character area design controls.
We design with the rule of “invisible from the public realm where possible.” That usually means siting the unit behind the line of the existing house, with screening planting along the side boundaries, and choosing materials and colours that recede rather than declare themselves. A weatherboard finish in a heritage-sensitive colour tones in. A polished concrete and corten steel unit in the same spot triggers the design controls. For more on what’s allowed in these zones, see our heritage overlay Auckland guide.
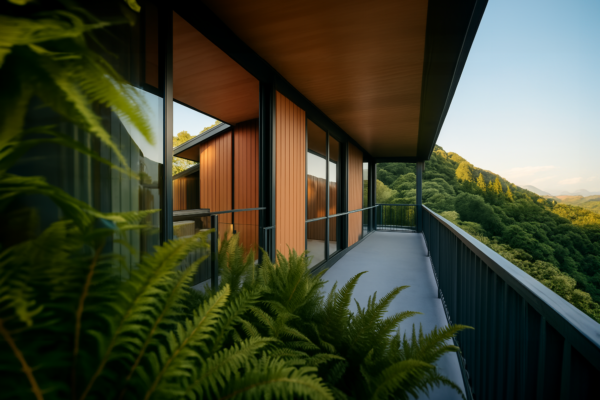
Sloping sections
Sloping sections — Titirangi, parts of the North Shore (Devonport, Birkenhead), Mt Eden’s southern slopes, and many of the hillside streets across Auckland — bring their own design problems. The exemption allows single-storey design but doesn’t account for split levels or stepped foundations.
On steep sections we often recommend going outside the exemption — into a full building consent process — to access design solutions that the exemption can’t accommodate. A unit that steps with the contour, has a lower-level storage tucked under one end, or uses retaining walls to create a level platform: these are often the right design answer even though they cost more in consent fees. The exemption is a tool, not a goal.
💡 Homeowner tip: Don’t let the exemption tail wag the design dog. If your section is steep, in a heritage overlay, or has services on the far side from where the unit needs to go, the full consent path with a properly-designed unit will often deliver a better long-term outcome than a compromised exempt design.
Five Design Mistakes LBP Designers See Most Often
After enough granny flat reviews, patterns emerge. Here are the five we see most.
💡 Homeowner tip: Most of these mistakes start at the brochure stage, not the construction stage. The design decisions that lock in a bad outcome happen in the first three meetings — site placement, services routing, and layout. Catch them early and they cost nothing to fix. Catch them at construction and they cost tens of thousands.
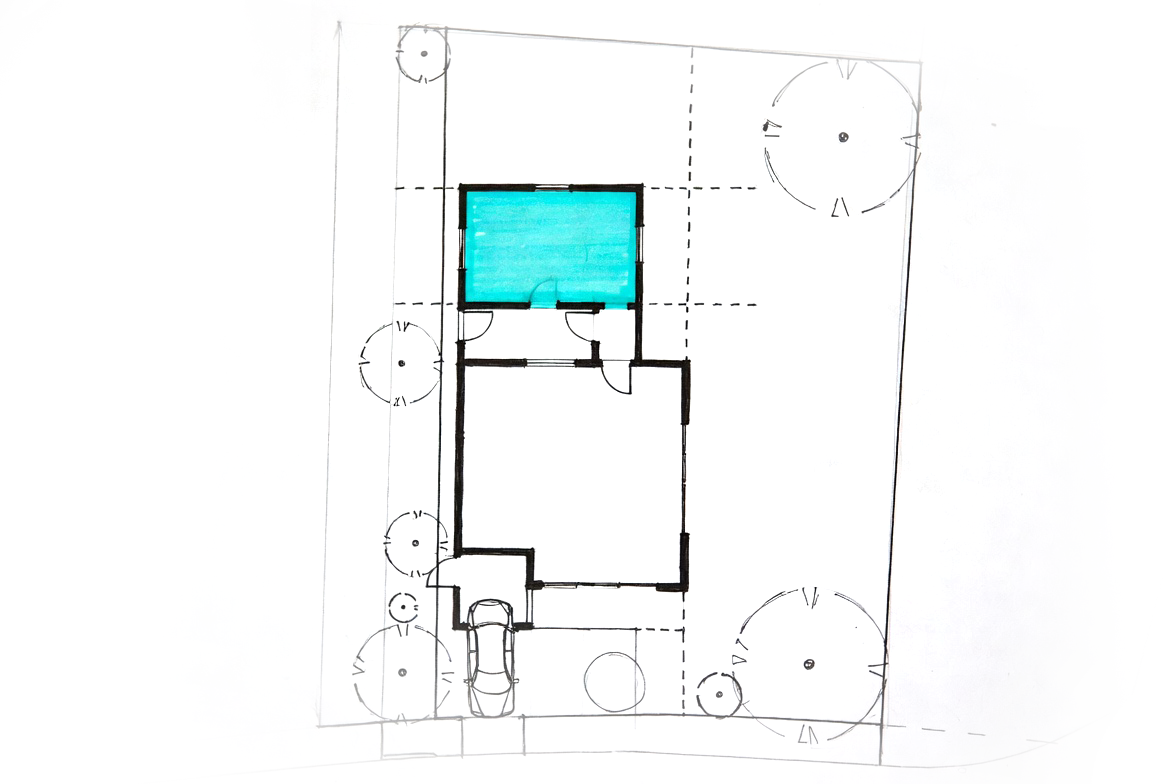
1. Wrong site placement
The unit is sited “where there’s space,” not where it works. The most common version: pushed to the very rear of the section, far from the main house’s services, with no thought to sun orientation. Result: 22-metre services runs at $1,000+/metre, a unit that gets afternoon sun only, and a long muddy path between the main house and the unit in winter.
The fix: site placement is the first design decision, not the last. We start every project by mapping sun, services, and access — then work out where the unit goes. Layout follows placement.
2. Services run cost ignored in the budget
Linked to the above. Homeowners get a fixed-price quote on the unit itself, then find out that water, wastewater, electrical, and stormwater connections aren’t included. Realistic services run cost on a typical Auckland section sits at $10,000-$25,000.
The fix: ask any prefab supplier for an itemised list of what’s included and what isn’t. “Site works” and “connections” are usually the words that hide the missing money.
3. Ageing-in-place details missed
A unit built for parents that won’t actually work when the parents are 80. Threshold heights above 20mm. Standard-width doors (760mm) instead of accessible-width (870mm minimum, 920mm ideal). Bathrooms with no wall reinforcement behind the tiles. None of these are expensive to fix at design stage; all of them are expensive to retrofit.
The fix: design for the worst-case mobility, not the current one. Reinforced bathroom framing costs about $300 at build. Retrofit costs $3,000-$5,000 and you’ll need to re-tile.
4. Rental units with no acoustic separation
A unit marketed as a rental but designed like a sleepout — single layer of insulation in the walls, single-glazed windows, no acoustic underlay in the floor. Tenants hear everything from the main house. Tenants leave.
The fix: specify acoustic-rated insulation in the walls and ceiling, double glazing throughout (now an H1 requirement anyway), and treat the unit as a properly separate dwelling acoustically — not just spatially.
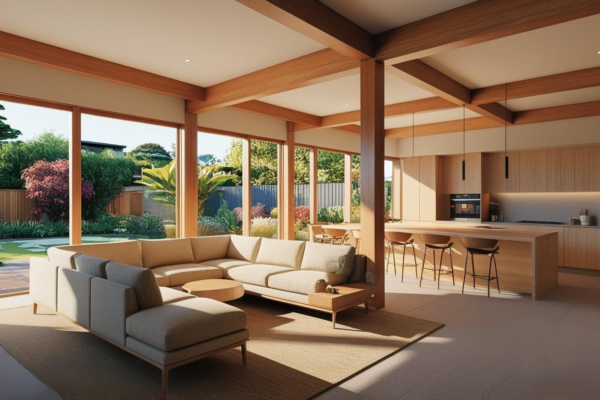
5. “70m² rooms” instead of “70m² homes”
This is the design failure that hurts most. A unit drawn as a single open box with partitions added, rather than a home designed as a sequence of related spaces. The kitchen ends up against the bedroom wall — you smell breakfast in your sleep. The bathroom door opens onto the living area, with no acoustic or visual separation. The front door opens directly into the kitchen, with no entry sequence at all.
The fix: design from the inside out. Plan the bedroom-to-bathroom relationship, the kitchen-to-living relationship, and the entry sequence first. Then fit the building shell around those decisions. A well-designed 70m² unit feels generous. A badly-designed one feels like a hotel room with a kitchen wedged in.
“The exemption gives you a smaller regulatory rulebook to follow. It doesn’t give you a smaller design problem. If anything, 70m² is harder to design well than 150m² — every metre has to do more work.”
— Sonder Architecture Team
Where to Start
Designing a granny flat in 2026 is easier than it’s been in decades on the regulatory side. The design problem is the same as it’s always been: small footprints reward careful design and punish shortcuts.
If you’re at the early stage — wondering whether your section can take a granny flat at all, or which of the three audience playbooks suits your situation, or whether the detached exemption path actually works for your site — our free feasibility report is the cheapest way to find out. We assess the site, check the regulatory constraints, give you a realistic cost range, and tell you honestly whether the exemption pathway works on your specific property.
Three good entry points:
➡ Book a free consultation with Sonder Architecture
➡ Request your free feasibility report
➡ Read our minor dwelling cost guide for the full 2026 budget picture
Frequently Asked Questions
Can I build a granny flat in NZ without consent in 2026?
Yes — from 15 January 2026, a detached, single-storey, self-contained dwelling up to 70m² can be built in NZ without a building consent or a resource consent, provided the design meets the exemption criteria and the work is carried out or supervised by an LBP (Licensed Building Practitioner). The exemption stops applying if the unit is attached, multi-storey, on a section with natural hazards on the council file, or on a heritage overlay site. Notification to the council is still required before and after construction.
How big can a granny flat be in NZ under the 2026 rules?
The exemption applies to detached units up to 70m² gross floor area. That's measured to the outside of the walls and includes everything under the roof — bedrooms, bathroom, kitchen, living, hallways, and any internal storage. A unit of 70.5m² falls outside the exemption and would need a full building consent. The 70m² limit is roughly 7.5m × 9.3m, enough for a comfortable one-bedroom design with a real living space, or a tight two-bedroom design.
Do I need a resource consent for a granny flat in NZ?
Not under the new rules, provided the unit qualifies under the NES-DMRU (National Environmental Standard for Detached Minor Residential Units). The unit must be detached, single-storey, up to 70m², and meet the standard's development requirements. If your section is in a heritage overlay, Special Character Area, flood-prone area, or coastal inundation zone, resource consent is still required. Check your section on Auckland Council's GeoMaps for natural hazard flags before designing.
What does a granny flat cost in Auckland in 2026?
Build costs for a 70m² granny flat in Auckland typically range from $4,000-$7,000+ per square metre depending on spec, site conditions, and whether you're going detached, attached, or garage conversion. Add $10,000-$30,000+ for services connection and Watercare fees. Total realistic budget for a quality 70m² detached unit on an average Auckland section: $300,000-$500,000+. Our minor dwelling cost guide has the full breakdown including the costs most prefab quotes leave out.
Can I attach a granny flat to my existing house under the exemption?
No. The 2026 exemption only applies to detached units. An attached granny flat — one that shares a wall with the main house — still needs a building consent. The trade-off is often worth it: attached units cost less per square metre to build, share services with the main house, and have lower heat loss. Whether attached or detached is right for you depends on your section, your services, and your design priorities. We work this through in every feasibility report.
Can I convert my garage into a granny flat without consent?
No. Garage conversions don't qualify for the exemption because the original structure wasn't built as habitable space. Converting to a self-contained dwelling means upgrading insulation, foundation, windows, floor levels, and often the roof framing to meet the New Zealand Building Code for habitable space. A building consent is required. Done well, conversions can deliver a granny flat at 50-70% of new-build cost. Done badly, the upgrades fight against the existing structure and cost more than a new build.
What if my section is in a heritage overlay or Special Character Area?
The exemption doesn't override heritage overlay or Special Character Area rules. These rules still apply and may require a resource consent for the granny flat — particularly if the unit is visible from the street or affects the character of the property. Common Auckland Special Character Areas include Ponsonby, Grey Lynn, Mt Eden, Parnell, Freemans Bay, and parts of Devonport. Design strategies that often work: site the unit behind the existing house, choose recessive materials, screen with planting. Our heritage overlay guide covers the design path that gets approved.
Do I need an LBP for an exempt granny flat?
Yes. Even though the building consent process is removed for exempt units, the work must still be carried out or supervised by an appropriately licensed building practitioner. That includes an LBP designer (like our team) for the design and Records of Work, and Licensed Building Practitioner builders for the construction work. The Records of Work are filed with Auckland Council and appear on future LIMs (Land Information Memorandums — detailed council reports on a property). This is what gives the exempt unit its formal compliance trail.
How long does it take to design and build a granny flat in Auckland?
For an exempt detached unit on a straightforward Auckland section, expect 4-7 months from first design meeting to move-in. Design typically takes 6-10 weeks, the build runs 12-20 weeks depending on weather and complexity, and services connections can run alongside both. For attached units that need a building consent, add 8-16 weeks for the consent process. Garage conversions usually fall between the two, typically 5-8 months. Auckland's standard building consent processing target is 20 working days, though complex applications run longer.
Can I rent out a granny flat I built under the exemption?
Yes. The exemption doesn't restrict use — the unit can be rented to anyone, used by family, used as a guest unit, or kept empty. The exempt unit is recorded on the property file and appears on future LIMs as a habitable dwelling. For rental use, design for separate metering (electrical at minimum), acoustic separation from the main house, separate entry, and a layout that prioritises spatial quality over bedroom count. A well-designed one-bedroom typically rents better in Auckland than a cramped two-bedroom at the same square metres.